

3 Phases of the Blog Writing Process To Streamline Your Writing and Boost Your Efficiency
If writing blog content feels like a never-ending to-do on your list as a business owner, you’re not alone. Between ideation, researching, drafting, editing, and figuring out how to actually get people to read what you wrote, it’s easy to feel stuck before you even start.
But as a blog writer and strategist for business owners, I’m here to tell you that the blog writing process doesn’t have to feel stressful!
Oftentimes, the reason it does is because you’re viewing it all as one task – something you do from start to finish in one sitting. But for your blogs to be most effective, it’s wise to follow a blog writing process that’s broken into phases.
In this blog post, I’m breaking down the 3 Phases of the Blog Writing Process – from prep to publishing – so you can streamline your writing, boost your efficiency, and feel confident hitting publish on a regular basis!
Phase 1 of the Blog Writing Process: Ideation, Research, & Outline
I know that's sort of 3 things in one, but I'm going to explain each of those in more depth in just a minute, so stay with me!
Essentially, the way I want you to think of Phase 1 of the blog writing process is it's your prep phase.
Just like when you're cooking or baking, you take time to prepare. You pull up the recipe, get all the ingredients out of your fridge and pantry, pre-heat the oven, and THEN you start the actual cooking or baking process.
And blog writing is no different – there's a prep phase.
During your blog prep phase, you’re ideating, researching, and outlining.
Blog Ideation
Ideally, your blog ideation would happen in one sitting during a quarterly planning session. This is something we do together in The Writer’s Room every single quarter so that members can brainstorm and ideate new blog ideas for 3 months at a time.
To do this strategically, I encourage people to follow my tried and true blog content planning process that includes:
Deciding how many blog posts you want to publish per month
Doing a blog topic brain dump
Incorporating holidays, national days, and internal business events into your blog content plan
Dividing your blog content ideas into quarters strategically
And something to know is that you’ll likely be ideating new blog topics allll the time – there's not really an end to the ideation part of the prep phase because oftentimes as business owners, we're constantly thinking of new content to create.
Which is why I encourage you to use some form of a Quarterly Blog Content Calendar so you can not only plan your blog content quarterly, but most importantly keep a running list of your blog topic ideas in one place so that they never get lost.
Blog Research
The second part of your blog prep phase is research and this can look different based on your blog topic.
Sometimes, you may have a topic that you want to write about, but it requires you to research a little bit more to get specific facts, statistics, quotes, things like that.
In addition to that type of research, you’ll want to conduct keyword research to ensure that you're aligning your blog topic with the appropriate keywords that people are actually searching for. All of this research will give you greater context for what you need to actually include in your content!
Blog Outline
The last part of the blog prep phase is creating a very rough outline. And when I say rough, I really do mean rough.
Oftentimes, my blog “outline” often just looks like some bulleted notes on my quarterly blog content calendar because I've found that's enough for me and it works well.
For example, this is a blog post I had planned for last October and this is a screenshot directly from my quarterly blog content spreadsheet.

I have the date, proposed title (which typically changes after I actually write the content) and the main points that I want to include in the blog post.
When I was planning my content for the quarter, I went ahead and listed these main points so that when it came time to actually write the blog post, I wasn’t starting from scratch. Instead, I had a better idea of the actual content that I wanted to include.
But the way you outline your blog topic can be super unique to you! You may find that you want to do a more formal outline for your blogs and that's totally okay too.
In that case, you might include:
H1 Proposed title (remember, this can change later)
H2 and H3 headers for main sections
Bullet points of key ideas for each section
Notes for links, examples, or references
Call-to-action(s) you plan to include
The idea is simply that you have something to work off of when it comes time to actually write instead of staring at a blank Google Doc for hours.
Overall, taking the time to PREPARE your blog content like this gives you the ability to jump straight into your blog writing when it’s time.
Phase 2 of the Blog Writing Process: Draft
Once you've completed your prep phase, it's time to move into Phase 2, which is drafting!
Ideally, this is the phase that you want to sit down to write in. (This is the phase that Co-writing Wednesday in my membership is for!)
The most important thing during your drafting phase, is that you KEEP writing no matter what – don’t pause to edit, link, add emojis, etc.
Let all of the thoughts flow, even if it’s messy because you’ll format and clean it up later!
Before you start writing, I encourage you to ask yourself 3 questions and the reason I didn't include these during Phase 1 is because I want these to be fresh on your brain as you're writing.
3 Questions to Ask Yourself Before You Start Writing
1. What action do you want your reader to take after reading this blog post?
Your answer to this question will become the main call-to-action of your blog post!
And remember: EVERY blog post needs a call-to-action of some sort – sometimes that’s an offer, other times it’s another relevant blog post, and sometimes it’s simply following you on social media.
The point is that you’re guiding your audience into their best next step!
2. What is the one main point or lesson your reader should take away from this blog?
This question will help guide your writing so that you stay focused on ONE thing throughout the post, so that your reader doesn’t become overwhelmed.
In long-form content, such as blogs, it’s easy to go off on side tangents and be tempted to cover a lot of topics at once. While you of course want to provide ultimate value for your readers, giving them too much information at once is like a firehose that doesn't really help anyone.
If you find yourself doing this while writing, simply jot down the additional topics that you want to cover and these can easily become future blog posts.
3. What should your reader think or feel while reading your blog post?
This is the actual emotion you want people to feel when they read your blog.
Asking yourself this question will help you determine your writing tone for the specific topic at hand.
After you’ve answered these three questions, it’s time to WRITE!
4 Tips for Your Blog Drafting Phase
Link Later
Oftentimes when writing, you’ll likely find that you need to link something throughout your content. Whether it’s a blog post that you’ve written in the past, someone that you’re referencing in your content, or a piece of research that you want to link to.
Instead of stopping in your writing tracks, simply highlight the section you need to link, make a note of what needs to be linked, and come back to it in Phase 3.
I can’t tell you how many times I go and search for what I need to link and then get distracted and start doing something else. That's not what you want during the blog writing process!
Forcing yourself to link later can improve your writing efficiency like you won't believe.
Title Last
One of the major mistakes I see people make is that they get so caught up in what the TITLE of their blog post should be from the very beginning.
The thing is, your title will likely change as you write your content and that’s totally okay! Because of that, start with your general topic, write your blog post, and come back to the title last.
This ensures that your title actually conveys what your content is truly about.
P.S. If titling your blog posts is a struggle for you, THIS free blog post titling guide (with 20 free plug and play formulas) can help!
Skip the Intro
Similar to trying to write a title right away, many people get super caught up in the introduction paragraph of their blog post.
And I get it — since this content is technically the first thing that your audience will read, it feels like it should be the first thing that you write.
In reality, you’re much better off to jump straight into the meat of your content and then come back to your introduction at the very end.
This ensures that you actually include the relevant information and context in your introduction because you already know exactly how the rest of your blog post reads.
But DON’T FORGET to actually come back and add this part of your blog – this is one of two sections that I see being skipped the most in blog content and though it might be the shortest part of your blog, it IS very important!
Use Placeholders
If you’re writing and find yourself getting stuck, can’t figure out the word you want to use, or can’t seem to fully form your thoughts for a certain section, use a placeholder word that you can revisit later!
If you use Google Docs, you can use the Find and Replace tool to easily find a word that you've written so you can easily navigate to your placeholder text and re-visit whatever it was that you needed to come back to!
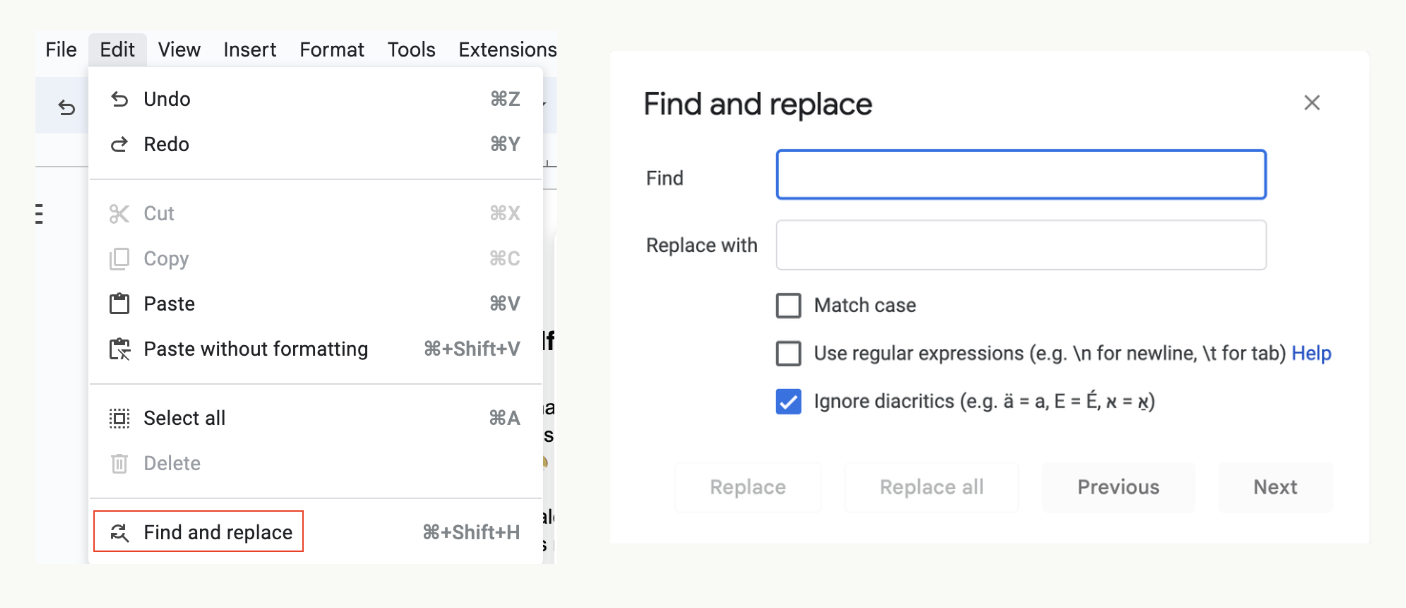
So for this, simply choose a word, maybe like your name or 'HELP' and use this Google Doc function to help you out during your editing phase.
Phase 3 of the Blog Writing Process: Edit, Finalize, & Publish or Schedule
Once you have a full draft, let it rest. Walk away. Take a break.
For me, this is where I’ll typically go eat lunch, go for a walk, or even mindlessly scroll.
I don’t care what your break looks like, just take one before you ever lay your eyes back on what you’ve just written. You can even come back to it days later if you want!
Once you come back to your writing with fresh eyes, this is where you’ll edit, finalize and either publish or schedule your blog post!
During your editing phase, I want you to follow a Blog Editing Checklist to make sure that you've hit all the boxes and everything is taken care of.
Blog Editing Checklist
Spelling + Grammar
First up on the checklist is of course Spelling + Grammar.
If you use Google Docs, luckily it will catch a lot of spelling and grammar mistakes for you and suggest any changes - for me personally, that's as far as I take it with my content.
But if you want to take things further, you can use a tool like Grammarly to check for grammar, punctuation, etc.
Formatting
Next, is formatting and this one is SUPER important, both for readability and SEO purposes.
Here’s a breakdown of how your blog should be ideally formatted:

Separate Your Paragraphs
Once you've got your formatting down, make sure that your paragraphs are separated for readability purposes. This is something that I'm constantly giving feedback on because it really does make a huge difference when someone is reading your blogs!
Here's an example:
This is an excerpt from one of my blog posts and this is what it would look like if I did not intentionally separate the sentences.
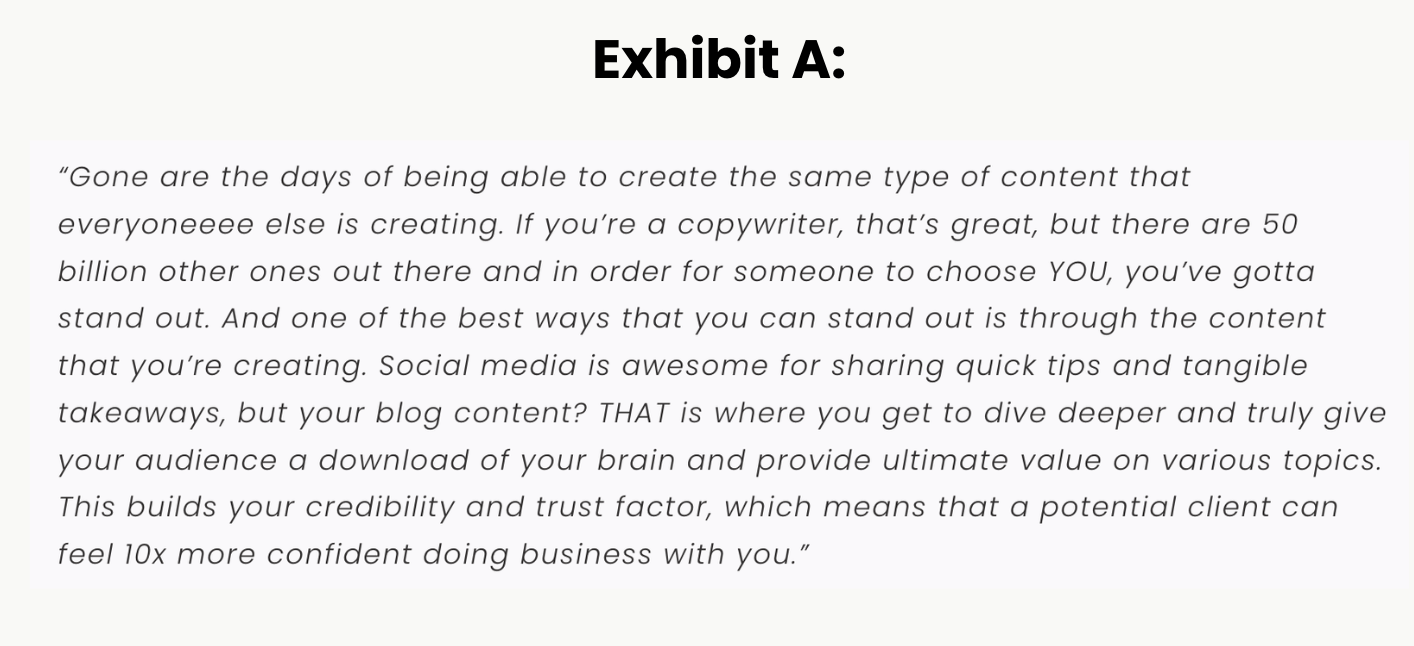
Sometimes this is a big adjustment for people and it can take some time to re-train yourself to write this way. And I get it – we were taught to write in paragraph form in English class. But something to remember is that your blog is NOT an essay! You’re allowed to throw out all of the ELA rules.
Traditional paragraph form isn’t easy on the eyes and it's not very skimmable for your reader.
Instead, you want your blocks of text in your blog posts to look something like this:
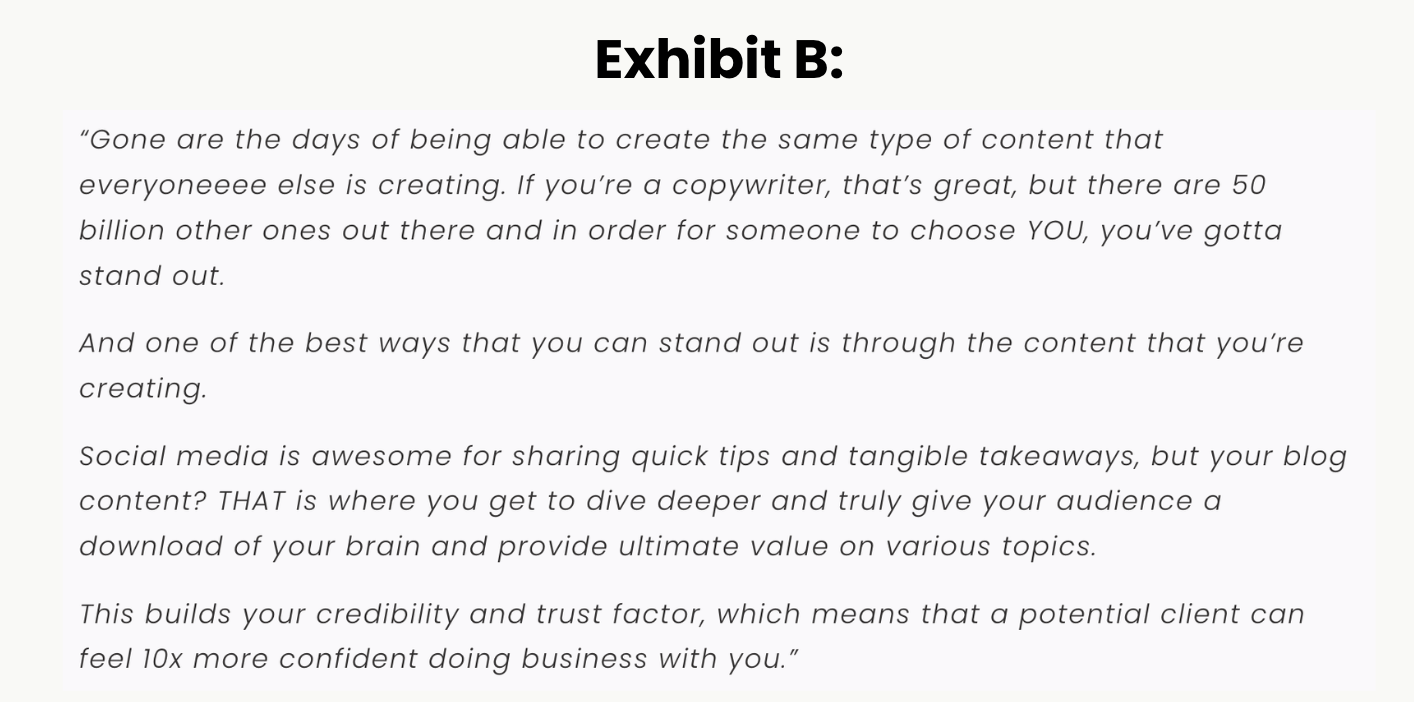
Same words, just separated and spaced out more.
This is easier to read, skimmable, and honestly just looks better!
So as you're editing your blogs in this phase, make sure you're scanning your content for any large blocks of text and separating them accordingly.
Add Emphasis + Points of Interest 🥳
Next is adding emphasis and points of interest to your content.
Just like you emphasize certain words when you're talking, you want to do the same in your writing!
This can be done by bolding, italicizing, underlining, using emojis (my favorite), em dashes (because NO, this is not a sign of AI!), squiggle line (~tilde~), etc.
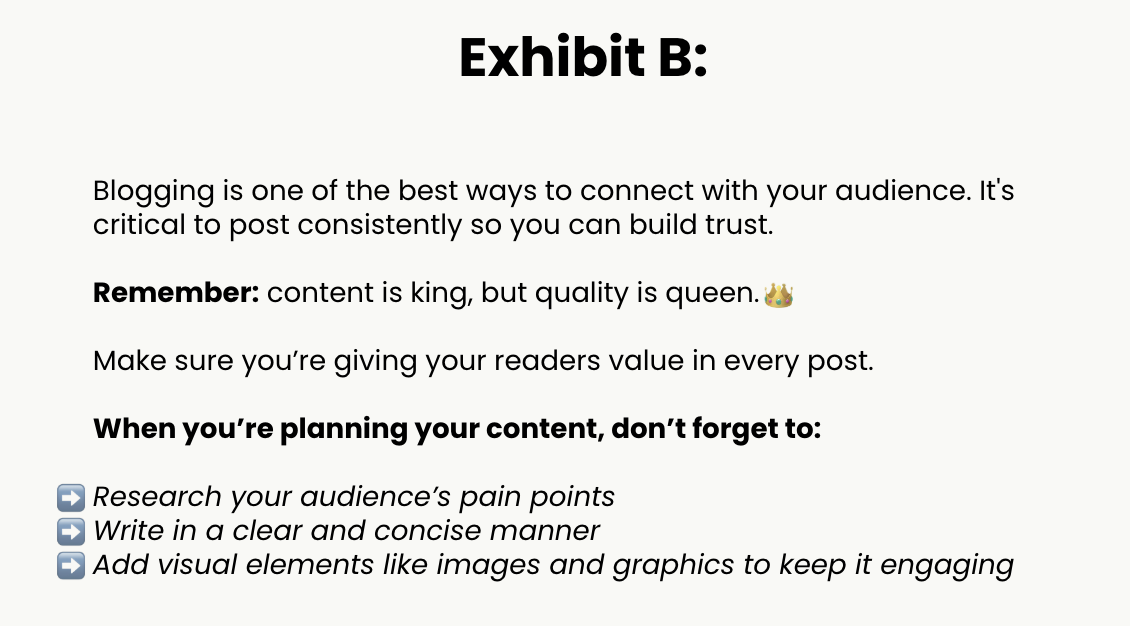
Here's an example so you can see the difference between text with and without emphasis:
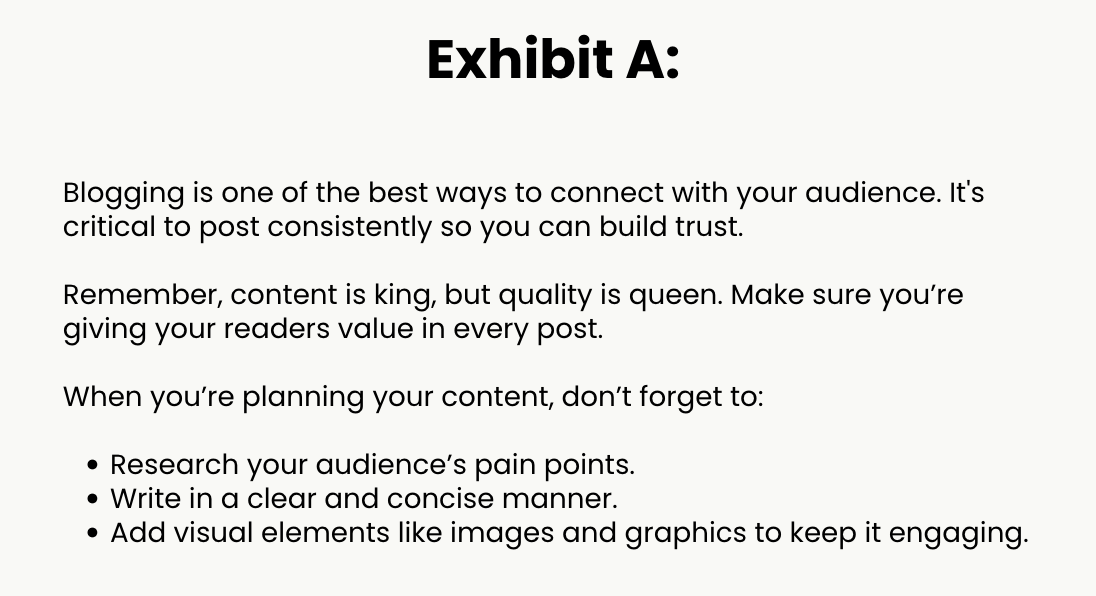
VERSUS:
Add Any Necessary Links
Next up, in your editing phase, make sure you go back in and add any necessary links that you need!
Whenever I'm drafting a blog post, I always highlight any words that need linking in yellow so that when I make it to Phase 3, I can easily skim my content and see where I need to put a link.
I suggest that you adopt a similar practice so that your content never gets published without linking where you meant to link!
Finalize Your Blog Title
Lastly, finalize your blog title!
One of my biggest tips when it comes to writing blog content is that you title last like I mentioned earlier and that's because you never necessarily know where your brain is going to take you when you're writing.
So you might sit down with a certain topic in mind, start writing about it, but then you're taken in a different direction than you initially thought, which would mean your blog title needs to reflect that.
If you try to title first, you're sort of boxing yourself into that title and not letting your creative juices flow. So instead, you're going to write your content and worry about the title here in Phase 3!
And again, if titling your blogs tends to be a struggle for you, this resource can help you out.
The Three C’s of Finalizing Your Blog Draft
Once you’ve edited and zhuzhed up your post, re-read it ONE more time to check for the 3 C's:
Cohesiveness
Conciseness
Clarity
To do this well, I want you to ask yourself:
Can your reader get to the point quickly?
My biggest pet peeve when reading blog posts is when it takes foreverrrr to get to the point quickly.
What you want is for your audience to read the title of your blog (which of course tells them what they can expect to learn) and then when they start reading, they are taken there pretty fast.
I know a lot of us are yappers and we like to talk, so sometimes maybe your intro gets a little lengthy or you get sidetracked in your content, but ideally that’s not what you want in your blog posts!
As you're re-reading your blog post one last time, go in with the eyes of a reader in your audience and ask yourself – am I getting to the point quickly?
Have you delivered on what you said you were going to in your intro?
As I mentioned earlier, your intro paragraph should provide context, establish relevance, and outline the main points of your blog so that your reader knows what to expect.
The last thing you want is to tell your readers that they're going to learn one thing, but then not address that.
So again, as you're re-reading your blog post one last time, go in with the eyes of a reader in your audience and ask yourself – am I giving them the info that I said they would receive?
Is there a conclusion that wraps everything up with a bow?
As briefly mentioned above, two of the things that I see people skipping the MOST in their blog content is a solid intro and a solid conclusion.
Just like you want to start your blog posts on a strong note, you also want to end them on a strong note and guide your readers into their next best step with a relevant call-to-action.
In your conclusion section, you should summarize the key points discussed in your blog post and reinforce the main message or takeaway. From there, you can move into the action that you ideally want your readers to take that directly relates to the topic at hand.
Which brings me to your CTA 👇
Are there relevant CTA's?
Lastly, every blog post, regardless of the topic, should include at least one call-to-action.
Oftentimes you'll find that you actually have multiple CTA's that you want to list and that's okay too, as long as they're relevant to the topic and make sense!
Most of the time, your CTA will likely be inquiring to work with you or directing your reader to learn more about your offers, but other times it can be something lower lift, like going to read another relevant blog post or following you on Instagram.
The point is that you aren’t just leaving your reader hanging – you’re giving them their best next step so they aren’t left wondering, “what should I do next?”
If CTA’s for your content tend to trip you up, this free CTA master list can help you out!
Blog Writing Tips and Resources for Business Owners
Overall, the blog writing process doesn’t have to be as overwhelming or time consuming as you might be making it. Because again – writing a blog post from start to finish in one sitting is RARELY how it happens!
Instead, when you break it up into three phases – prep, draft, and edit/finalize – you give yourself a clear roadmap that helps you focus on one step at a time instead of staring at a blank page.
With this blog writing process in place, you’ll likely find that writing your blogs becomes faster, easier, and more strategic, so you can focus on creating content that actually moves your business forward!
If you’re looking for more blog writing tips and resources, I’ve got you covered:
Download The Beginner’s Guide to Blogging for Your Business – a free guide to help you start blogging in your business with ease and consistency
4 Step Process For Creating a Blog Content Plan for Your Business
If you’re starting your business blog from scratch and feel a little overwhelmed and not sure where to start, that’s why I created my custom blog strategy service, The Manuscript!
With The Manuscript, you get:
✔️ Kickoff call to discuss your blog goals, ideal audience, & desired publishing schedule for the long term
✔️ Custom blog strategy creation WITH defined blog content pillars, a quarter’s worth (up to 12) blog topics tailored to your goals and audience, PLUS ideas for how to repurpose your blogs on other platforms
✔️ Strategy delivered via Loom
✔️ 30 days of Slack support so you feel confident putting your strategy into action WITH the option to submit one piece of writing for review per week
New to my world? Nice to virtually meet ya. 👋 I’m Natalie, but everyone calls me Natty (you can too) – blog and email writer for creative business owners and service providers.
If you like what you read and want more, there’s a few ways we can stay connected:
Binge the blog for a mix of blog and email writing tips, how-to’s for blogging in your business, tangible resources, and of course a little bit of BTS of a blog writer’s life along the way.
Browse the tools, recs, and resources that I personally (and professionally) couldn’t live without.
If you’re in need of some blog content in your business, or are simply curious about what that would look like, check my services here.
And if you just wanna say heyyyy, follow me on the ‘gram and send me a DM!